 |
Time Buckets for Windows 8.1Gregory Consulting is pleased to announce the release of
Time Buckets, our time tracking application, redesigned for Windows 8.1 and Microsoft Touch devices. Time Buckets provides a natural and simple way to track the time you spend - project by project, activity by activity, whatever way you want to track it. You create one or more "buckets" and then let time flow into the buckets - the app doesn't need to have focus while time is being recorded, in fact your device doesn't even need to be on. You can look and see how you're spending your time over a day, week, month, or year at a glance. |
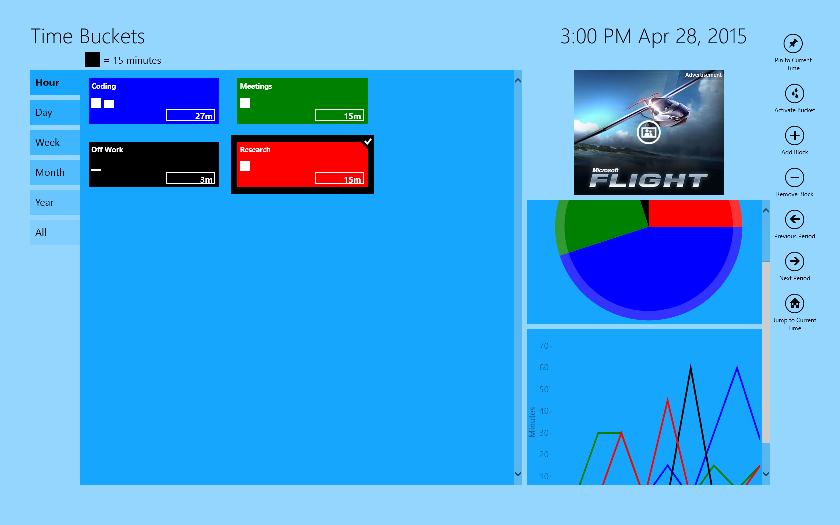
Here, the user has created buckets named after specific actions and has selected the "Research" bucket . The line graph shows a report based on the view you are in (Hour, Day, etc.), while the pie chart shows ratios based on the time period you are viewing.
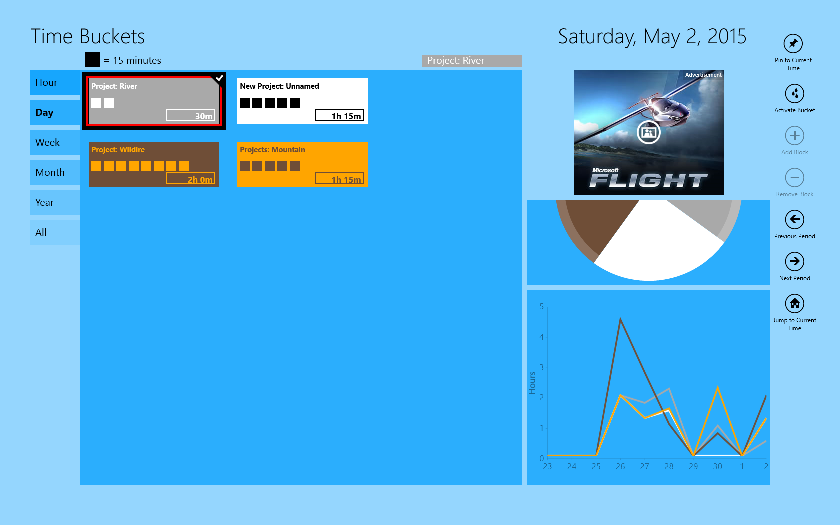
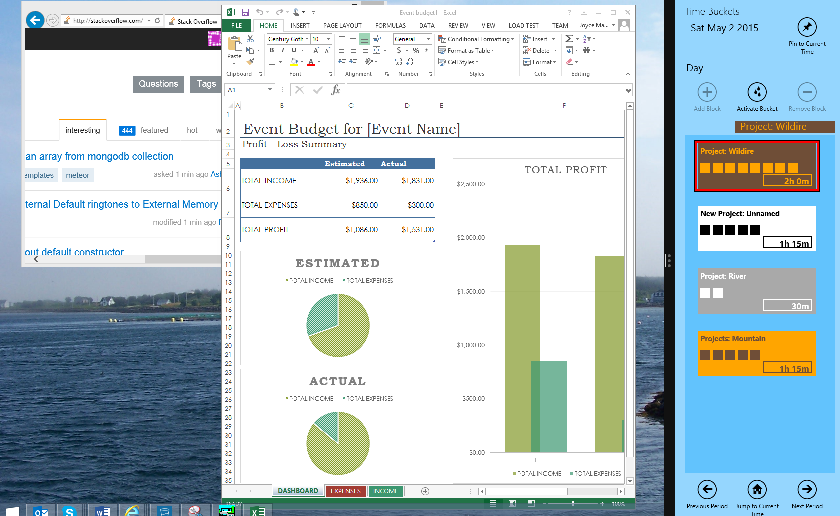
Here, the "Project River" bucket has been made active (red accent border around it and stripe above the bucket grid) by tapping the "Activate Bucket" button seen on the right with the water droplet icon. This user has named the buckets as projects and is viewing their time in Day view.
Made a mistake? No problem. You can toss an extra 15 minutes into a bucket with a single tap, or take 15 minutes out. You can "go back in time" to turn off time flow into a bucket, or to switch it to a different bucket. And you can edit any bucket, any time. Your data is backed up on request to your OneDrive or local computer, and you can export a CSV if you'd like to do some analysis.
After all, tracking your time shouldn't be complicated, time consuming, or something you don't dare forget. Time Buckets is simple, supportive, and adaptable.
Want to Get Started?
Time Buckets
is available from the market place,
download it now!
When you install Time Buckets, the first thing you'll want to do is add a bucket to capture time in. Right click (or flick upwards on a touch device) to bring up the app bar where you will be met with a variety of options. Click the "Bucket Actions" button, then the "New Bucket" button. You can name your buckets whatever you want and use whatever kind of colour scheme you want. Some people make the background colours meaningful (green for billable work, blue for personal, that sort of thing) while others want a different background colour for every bucket so the live tile will remind them what they're collecting time into.
Once you have Time Buckets installed, consider pinning it to your start screen.
The live tile shows an empty bucket when you're not accumulating time.
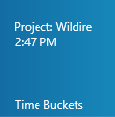
When you are sending time to a bucket, the live tile has two distinct and helpful features:
When the tile is medium size, it flips between a bucket image that is coloured to match your active bucket and some more detailed information, such as the bucket's name and accumulated time.

In the wide tile, we display all the information on the square tile all in one place with some additional information.
If you drag Time Buckets into just one half of the screen and then resize it to be narrow, eventually it will flip into a different layout we call "Narrow View". This is perfect for leaving at one side of a monitor so you can switch time to flow into different buckets as you move from task to task.
Using the button bar at the right (top for portrait or narrow view) is the simplest way to track your time. Click the falling drops button to toggle sending time to the selected bucket (which will be drawn with a highlight when you select it.) Add 15 minutes to the selected bucket (when you're on the hour view) by clicking the + button, or take 15 minutes away with the - button. (You can collect more or less than an hour of time each hour if you want, it's up to you.) Just realized you're still sending time to Project 1 but you've been working on Project 2 since 10:30? Leave the time sending to Project 1, select Project 2, open up the app bar and choose Switch in Past. You can enter the time you changed projects and the time will be moved from one bucket to the other, and time will flow to Project 2 from now on. Or if you weren't collecting time, but you've been working, use Switch in Past to make the correction.
There are 6 views: hour, day, week, month, year, and all. On each view you can use the button column on the right (top for portrait
or narrow view) to move forward and backward with the arrows or flip through the dates with your finger on a touch device. The Home button takes you to the current date and time. The Pin button at the top of the column navigates you automatically. When it's active, if you're on the hour view at 10:59 you'll be seeing the hour that spans 10:00 to 11:00, and when you glance back a few minutes later you'll be seeing the hour that spans 11:00 to 12:00. If you don't like that, Unpin and you'll stick on a selected time span until you navigate to a later one, no matter how much time passes.
Realize that yesterday's totals are a complete mess? Navigate to the hour that includes the wrong part, select a bucket that has too much time, and on the app bar under "Bucket Actions", choose Transfer Bucket. Type in how much time to take from it, and select what bucket to send it to. Or choose Edit Bucket and just change the time that accumulated in that bucket during that hour. (You can only make changes to the time that accumulated when you're on the hour view. The other views are for seeing how your time was spent.)
The Transfer function is also useful when a project ends. If you don't want to track that time separately any more, you can transfer it all to some sort of archive bucket.
On any view, bring up the Charms Menu (the slide out menu on the right side of the screen), select "Settings", then choose "Snapped" and you can hide the whole view (to make scrolling through views faster when the app is snapped) or change the sort order - alphabetical by bucket name, buckets with the most time first, or buckets that most recently got time first. Each view is independent so your hour can be "most recently used" first, while your day is "most time first" and your week, month, and year are alphabetical.
You can also bring up the Charms Menu, choose Settings, then Snapped to bring back a hidden view (just toggle it from the Snapped settings list) and to govern whether empty buckets should be shown and how buckets are considered "old" and not shown.
You can keep copies of your time on OneDrive or local drives. Bring up the app bar, click "File Actions" and click "Back up". In the save picker that appears on the screen, you can select your OneDrive or one of your local folders and save to it. Since OneDrive only supports a few file types, we save .txt files, but inside them we use two different formats. Export writes a comma separated values (csv) file - after you rename it from .txt to .csv you can open it with Excel and make graphs, track trends and totals, and manipulate your data however you want. Backup writes a file of XML. You can Restore from an XML file any time. You might want to adopt a naming convention like May5bak.txt or May7csv.txt to help you tell these apart when you're restoring. Or you could keep them in different folders on your OneDrive.
Should you come across any issues be sure to let us know, please email
support@gregcons.com and let
us know things like "What device are you using?" "How many buckets did you have?" or "Are you using a touch device?"
and a description of the behaviour. If you can take a screenshot and include it with the bug report, we'll be
super grateful.
We’d love it if you could drop us a quick
email with your story about how you are using the application and what it has made possible. Screenshots are welcome! And if there’s something specific you do by hand with your information that we could add into the application for you, please let us know about it.
Things to be careful about
Once you direct the falling drops into a particular bucket, you don't need to keep the app open, or even keep your
device on. We just record that at this time, you started on Project 1 or whatever your bucket is called. Eventually you will send the drops to a different bucket or turn them off, and then we'll subtract to work out how long you spent working on Project 1. As a result there are two times you should NOT be sending the drops to an active bucket:
- When you run a backup. If you restore a week later the first thing Time Buckets will think is that you've been working on that bucket the whole time. You can fix this with deactivate in past, but it's simpler to deactivate before you backup.
- When your device changes time zones. Time is kept according to local time - so if you set the clock back an hour, you might charge 60 minutes between 1:00 and 2:00 to one project, set the clock back to 1:00, and then charge 60 minutes between 1:00 and 2:00 to another project. It will all work out in the end. But if you activate a bucket at 1:00, work for two hours and set the clock back in the middle, since your device thinks it's only 2:00 when you deactivate the bucket, only 60 minutes will get charged to the project. Deactivate, let the time change, and then activate again. If you're getting on a plane, before you come out of airplane mode make sure you don't have an active bucket. Then once the clock is synced you can go back to accumulating time.